
Wanna capture the action? Here’s how.
Part III
This blog is a three-part serious and so if you haven’t read the previous 2 blogs, I highly recommend you start there since it will explain the overall concept of the exposure triangle when shooting in manual mode and aperture.
Shutter speed
If you have read the previous blogs or maybe you are just interested in shutter speed, then read on my friend.
Shutter speed was my favorite setting to learn. I had small children who moved ALL the time. I wanted to be able to capture them in the bounce houses, playing sports or just running around on the playground. My kids really LOVED when I was learning about shutter speed because they just got to play, and I took photos. On the top of your camera is a mode dial with different types of settings. – Find the “S” on most camera’s (Nikon included) or “TV” on a Canon camera (which is Time Value). This is the Shutter Priority Auto. When this setting is chosen on mode dial it means you set the shutter speed on your camera, or you get to decide how fast the lens opens and closes.
So, you can capture that moment with your kids in the air on the bouncy house with a crisp clear photo or you can decide to show the motion of them jumping with some blur. I don’t know about you, but I never really had any trouble with the blur part and my kids, it was the crisp clear action shot that my heart desired. If you want crisp clear images then we just crank that Shutter Priority, right? Welllll yes and no. There is always a give and take in life isn’t there? It’s the same with photography. If you crank the shutter priority up, you sacrifice the light coming in. Remember the blog about the exposure triangle? Shutter Speed is how fast the lens opens and closes. Remember the faucet? Do you turn it on, so a trickle comes out? Or do you turn it all the way on, so it gushes water? The higher the shutter speed the faster the lens opens and closes. On a full sunny day outdoors that’s not a big deal but if you are indoors you will have to decide how much light you can give up and still have a photo that is not just black.
The trick is to…
1. set the camera to the “S” (or “TV” if you have a Canon)
2. set the ISO as well and I recommend setting it at 200-400 for this experiment if you are outside.
3. The camera will decide your aperture or F-stop for you.
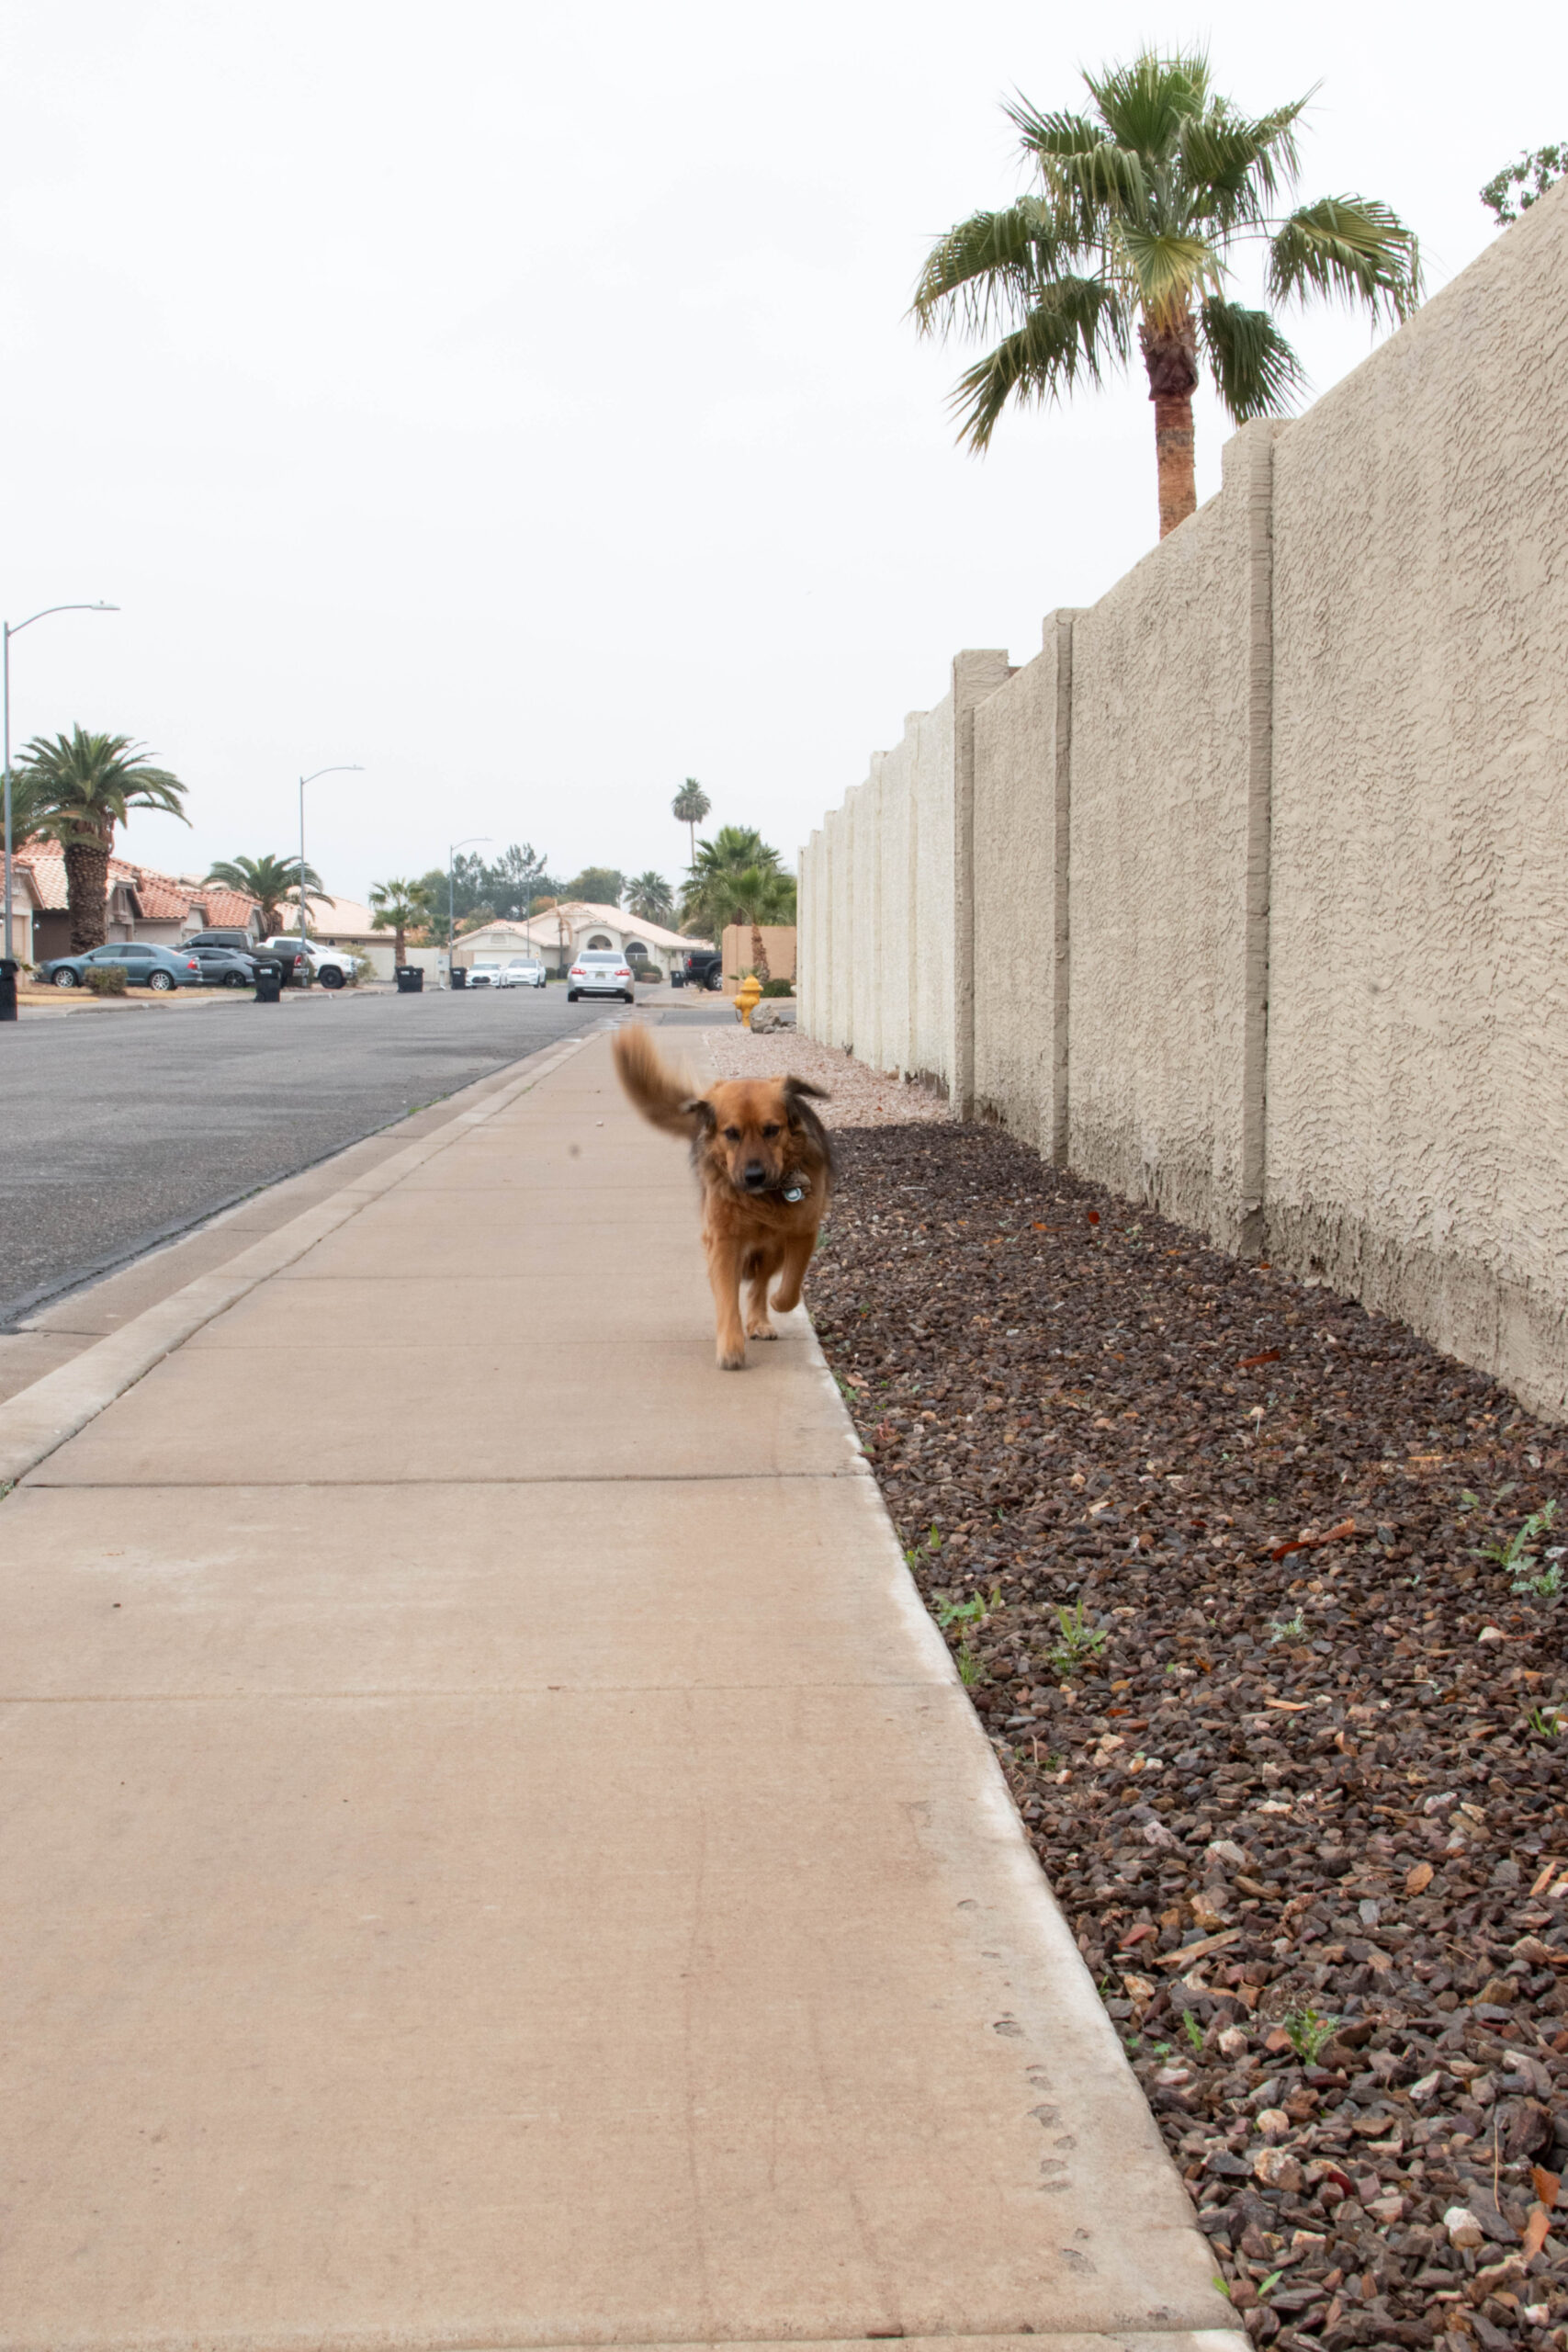
Make sure to check out what the other settings are as you adjust the shutter speed. Here are some examples:
-

- Shutter speed 60 F1/20 ISO 400
-

- Shutter speed 200 f 1/11 ISO 400

-
- Shutter speed 1000 f 1/5 ISO 400
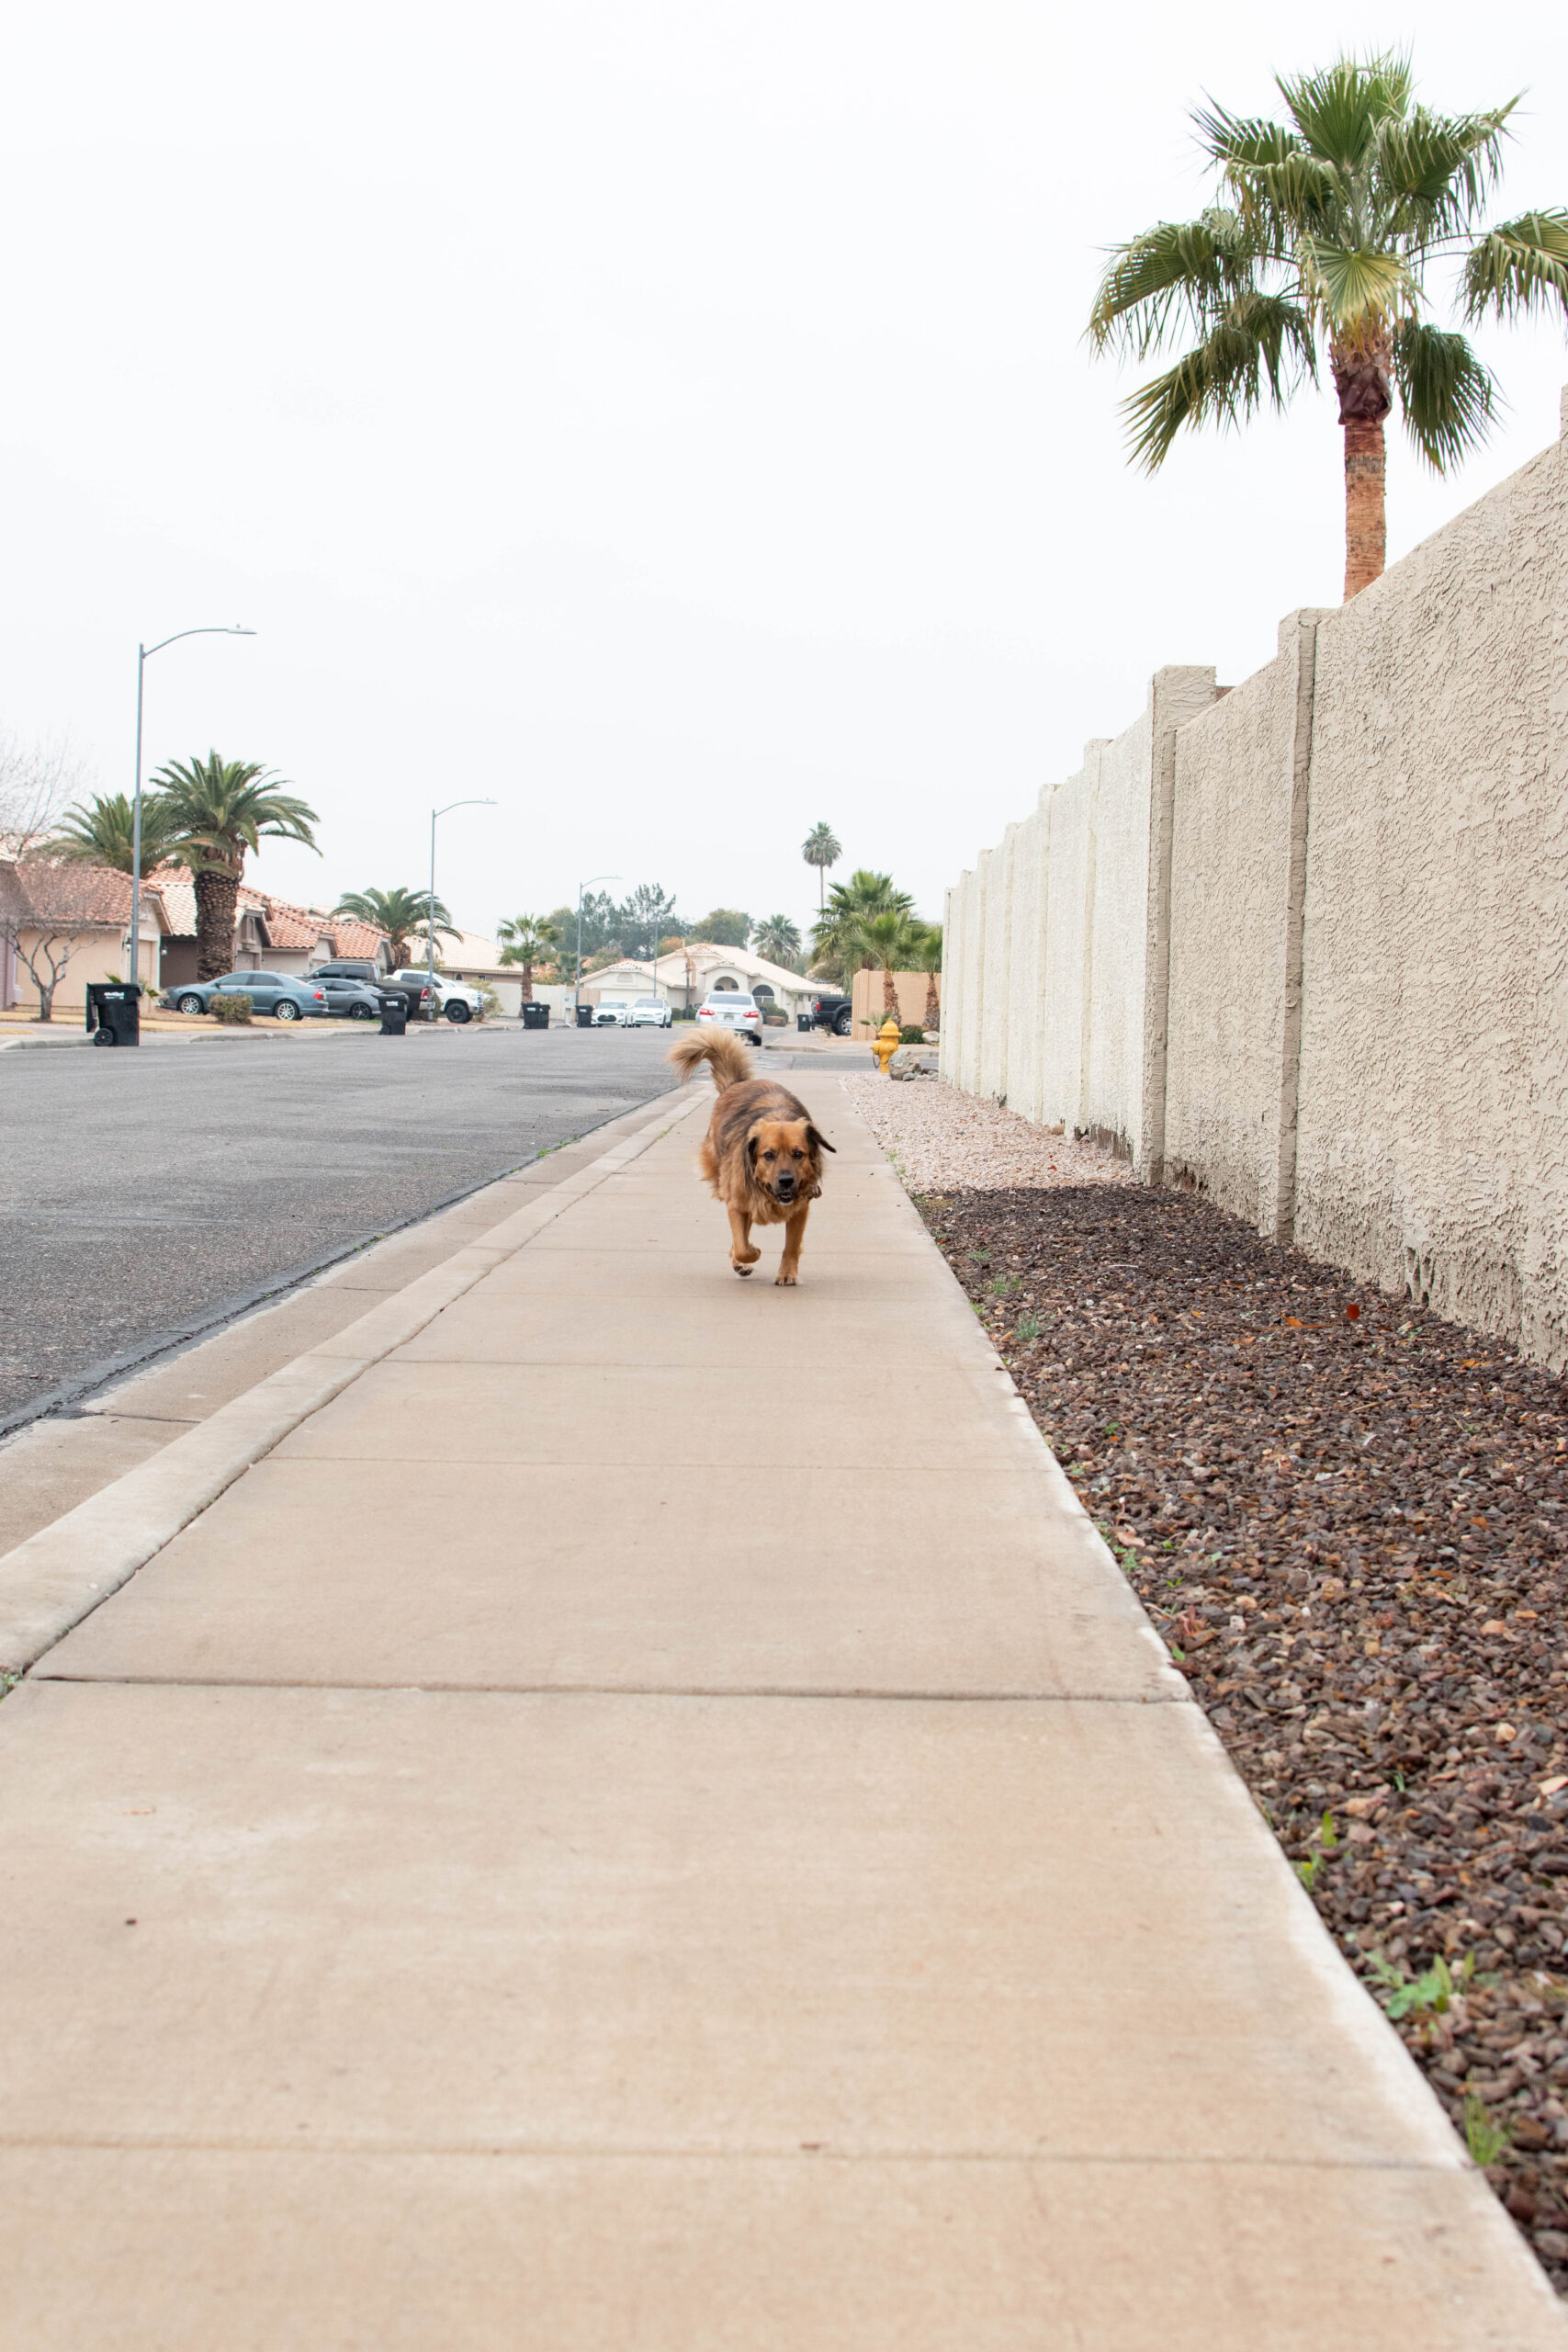
I didn’t edit these photos so you can see how they come straight out of the camera. You can see the blur on my dog Layla in her tail in the first picture but it’s not there in the 3rd.
Now it’s your turn. Take you kids out to play and snap away. You get to decide if you want the blur or not. If you take the time to try this out, drop me a couple photos on Facebook, Instagram or email. I can’t wait to see what type of photo art you create.
Follow me on: